Wednesday, April 16, 2025

Broken celluloid


This celluloid doll was made by the German company Schildkrot.

He has an obvious issue. 
The top of his head is in several pieces. The enveplope contains a handfull of very small pieces.


A less obvious issue is that his arms are hanging and loose. The elastic needs replacing.


At one point some of his head pieces were taped together. You can see old tape residue along the edge here. That needs to get cleaned off before reassembling the bits.


Some of the pieces have cracks.


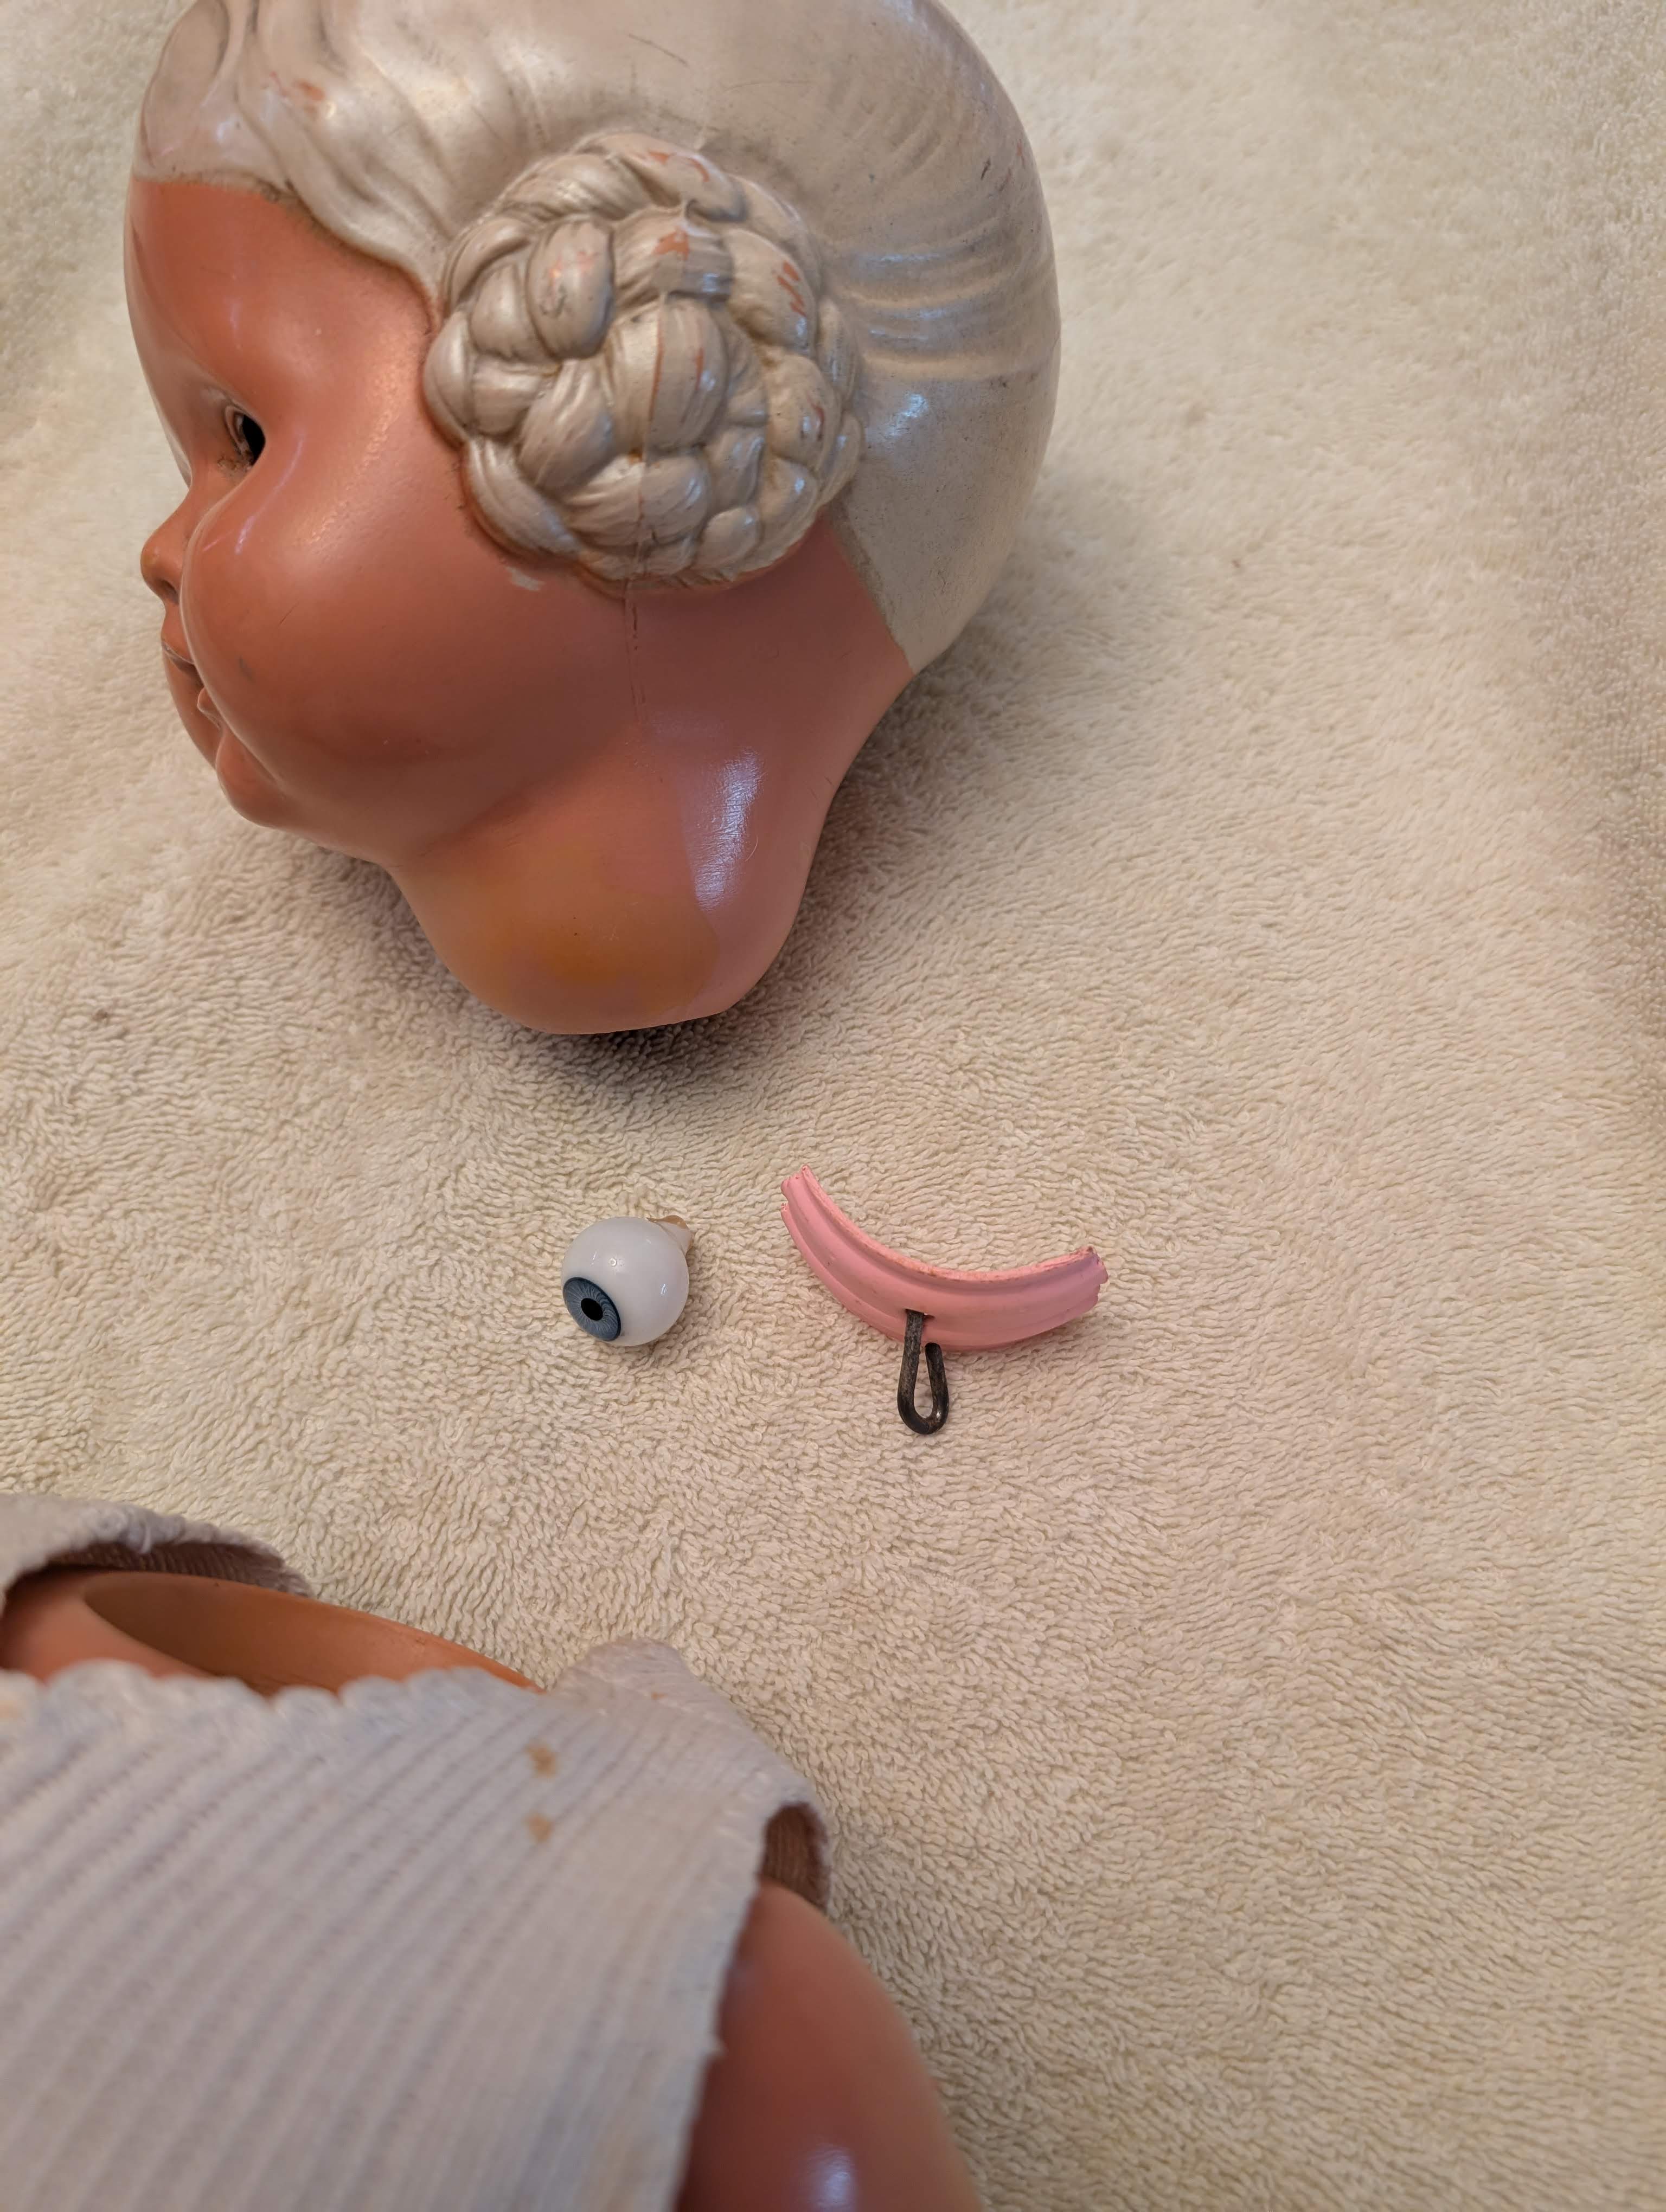
Some of the contents of the envelope.

This is going to be a persnickety jigsaw puzzle!


One nice thing about celluloid is that you can fuse pieces together with acetone. So, once you figure out where a piece goes, you hold it in place while running a fine paintbrush dipped in acetone along the crack.

Here I have pieced some of the smaller bits into their spots.

The darker peach is a permanent colour change caused by the adhesive tape used in that previous repair.


Gradually he gets back together.


All the pieces are back together although the top of his head has not been fused on to the bottom yet. I am contemplating what to do with three small chunks that are missing.


His head is fused together now and I have filled in the holes with a tinted epoxy.

Now to see if I can minimize the scars and even out his colour.


He aslo has a nose dent that I would like to try to make less obvious.


One of the things I am trying is an epoxy paste that I have tinted.


The paste makes gives his nose a better contour.


Lots of trial and error to get to this point!


His arms get restrung and he is ready to go home.


Sunday, April 6, 2025

A broken bisque baby


This doll has arrived.

She is a vintage bisque head doll who has met with a grievous injury.

Most of her bits have arrived. Apparently some were in smithereens and were not saved.


Step one is to glue the pieces together.
That reveals where the missing pieces came from.


With bigger defects I like to put a in a base to support the sculpting epoxy. This is a small piece of automotive mesh that I have glued under the hole.


I forgot to take a picture of the epoxy putty in place but here it is smoothed and painted to blend in.


Thursday, April 3, 2025

A detailed Schoenhut doll's restoration


This doll has arrived to be restored.

She did not always look like this. She had a total head repaint when her owner bought her. 


She once looked like this.

This is Schoenhut's model 105.

She had been repainted but did not look like she should.

So, off came the repaint!


Here she is part way through the repaint removal.
Sometimes, when removing repaint, you find nice original paint underneath.
Unfortunately this was not the case here.
There is little original paint left.
Her owner took off most of the overpaint and decided to send her to me.


Here is where I start.

There is white filler here and there.
There is some original skintone paint left.
There are two colours evident on her headband....which is the original?


I like to remove old fillers as sometimes they are obscuring original details. Here the filler is giving the carved bow a too high profile and a too smooth surface.


After a bit of poking about with magnifying glasses, I find out that the blue is the original colour of her headband. 
Here, I have removed the pink paint from her headband and much of the previous filler from her face. This does reveal a large hole in her nose. What caused that is anyone's guess!


Here is the bow after the filler and pink paint layers have been removed.

Now I contemplate the very dark hair colour. Is it original?

Almost certainly this doll had a factory repaint. The Schoenhut factory offered repaint services to dolls that had been played with and needed their paint refreshed. That would mean she was originally made with a blue headband and had it changed to pink during the return to the factory.

Was her very dark hair colour also a change from her original?


A celluloid doll with eye issues


This doll has arrived to address her missing eye. It hopefully is not missing. Something is rattling around inside her head. We shall hope it is her eye and it is not broken. The eyes are glass.

There are glue remnants around the remaining eye. According to her history, her eyes were repaired before.


She was made by the German company Schildkrot. She is made of celluloid.


On further inspection I find some cracks in her legs. Someone already has had a go at the cracks as there is lots of glue residue along them.


Happiness!

Once the doll's head is removed, out pops the missing eye......intact!

The curved widget is the piece that sits inside her head to string it to the body.


Here is a view inside her head. I have to re-glue the loose eyeball into the socket. But, my fingers are not long enough to position the eyeball.

I need an eye holding tool.


A bit of wire gets bent into an odd shape.


This shape will hold the eyeball as I insert it into the socket.

I use a few dabs of tacky glue on the socket. It is water soluable so, if I mess up, I can reverse the installation with water.


Success!

As the old glue holding the eyes is aging and weakening I added a layer of epoxy around each eyeball inside the head to hold them in more securely.


Her legs were more troublesome.

Normally broken bits of celluloid can be fused together with acetone. But, the previous repair and the old glue remnants were not letting that happen. So, I elected to use tinted epoxy to fill in the cracks. She has scars which could be filled/sanded/painted to disguise them. But she has clothes that will hide the scars. They will remain as is.


Ready to go home.