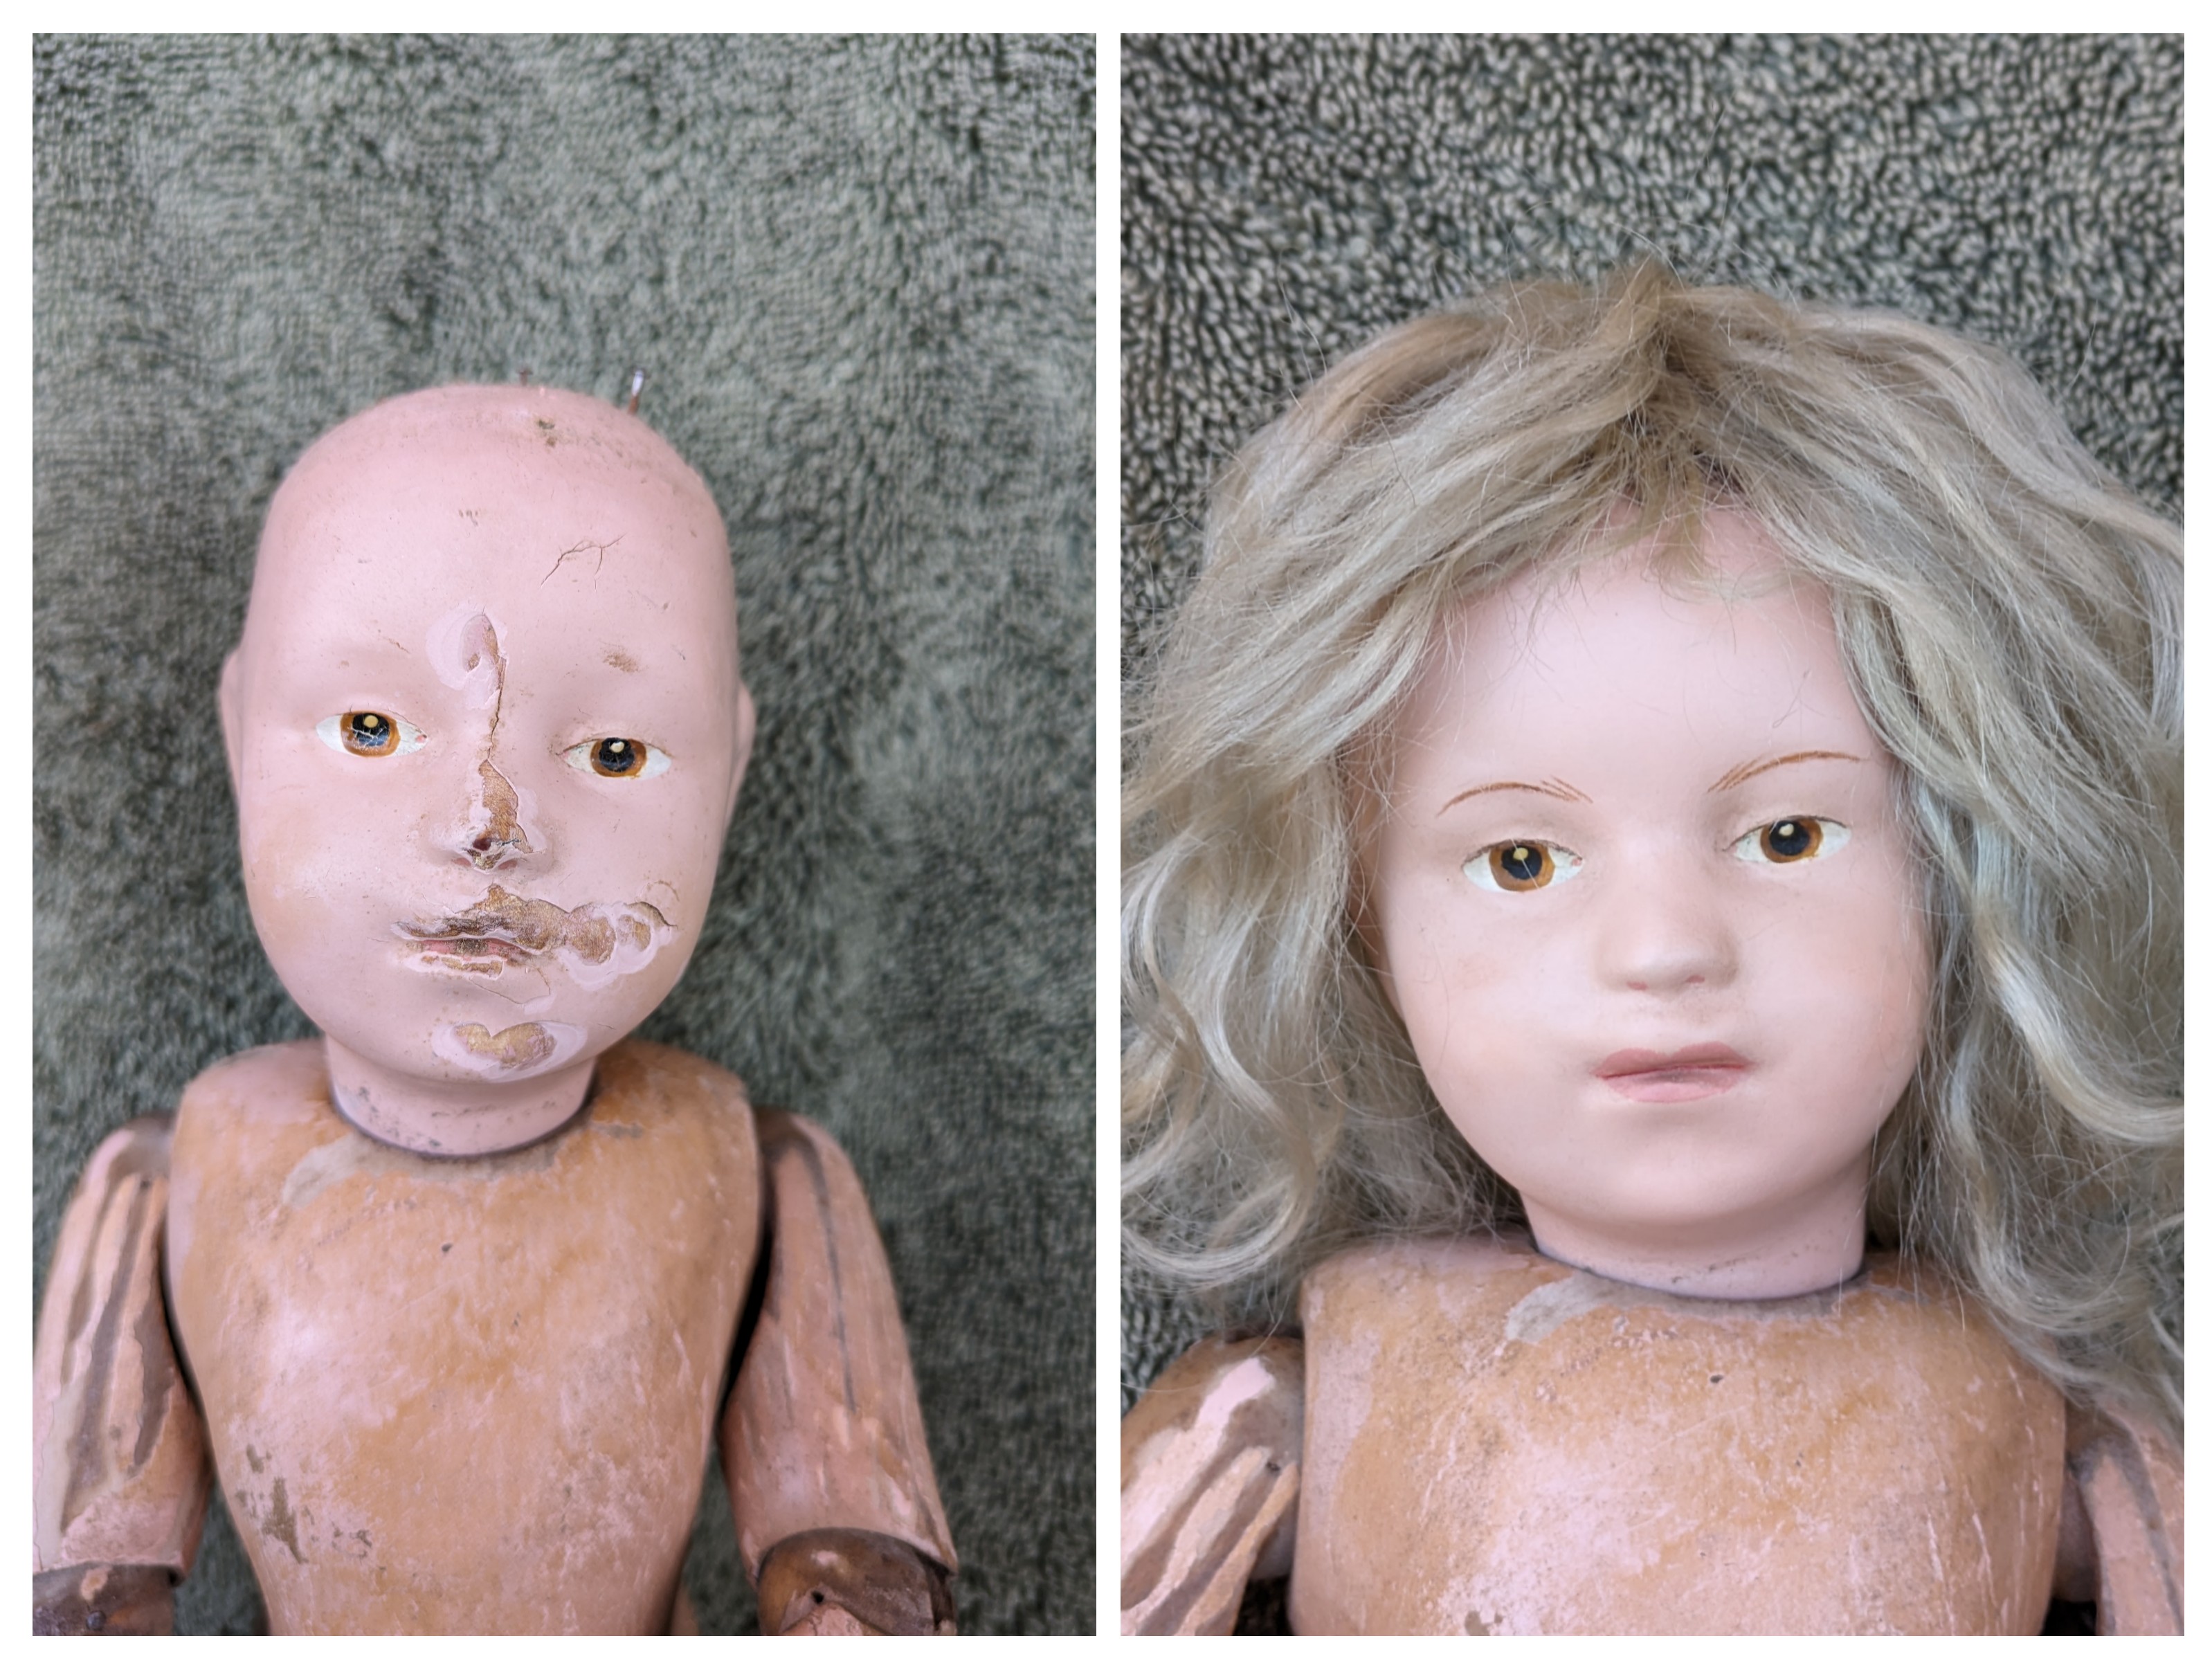
Here is the picture I was sent.
Please can you fix this doll?
I said I would try.
Your favorite childhood doll or toy has just been found stuffed away in a box in the basement? It is cracked and dirty and your family urges you to throw it out. But it is full of memories and despite its many flaws, you just cannot discard it. Doll doctors and restoration artists can help. Many of the saddest dolls and toys can be restored. I restore dolls from my home base in Ontario. Wintertime however, finds me packing up a few projects and fleeing to Florida to work in the sunshine!
Here is the picture I was sent.
Please can you fix this doll?
I said I would try.
This doll has arrived for repairs.
She doesn't look too bad from this angle.
That is a lovely factory original dress she is wearing.
Her big problem is that a large chunk of her head is missing.
Her arms are peeling a bit.
The cloth above each arm has issues.
How do you close a massive skull defect like this?
I make a base from automotive repair mesh and epoxy it into place. Then I start rebuilding on top of the mesh.
Here we see the metal mesh installed in the head.. The grey is the epoxy paste that I used to glue it into the head. The beige is another type of epoxy paste that I am using like a spackle to cover the mesh.
This handsome dude is a 'yes-no' monkey made by the German company Schuco. He dates to the 1920's or 30's.
When you manoever his tail his head will nod 'yes' or shake 'no'.
But, his tail has lost its mohair covering and there is a rip in the mohair above the tail.
He has a tear in his mohair behind his ear.
The tears are no problem to repair.
I want to get some new mohair to cover the bare wire of his tail and finding this colour of mohair will be tricky. It is a lovely cinnamon colour.
In a local thrift shop I find some mohair fabric ends. At $1.50 for each, this sure beats ordering mohair online! Now I have to try to dye this mohair a cinnamon colour.
This is the first attempt. I dyed a piece of each mohair plus a bit of muslin for repairing those tears. Not bad....but the mohair needs to have a bit more red in it to match.
This second dye attempt looks better.
To fix that big mohair tear, I insert a piece of the dyed muslin under the tear. That will get tacked to the mohair to strengthen the repair before I start darning the tear.
The tear has been secured. Now he needs a replacement tail made from the dyed mohair.
This is Schoenhut's model 203. She was bought like this hoping to find something good under all that too-shiny repaint.
Her new owner stripped off the repaint and found this.
Not too much goodness was found under that paint so she was sent to me.
After the usual makeover processes, I sent her home looking like this.